Pierogi recipes and "how to make" – original Polish tradition with tips & tricks
Why is it worth to learn how to make pierogi?
I'm a person who made at home a lot of pierogi. That, in consequence, took me to a point of a deeper understanding of the entire Polish food culture. And that is why I have a sense of duty to advise you to learn how to make pierogi at home. In general terms, it is a quite simple task. It also is a very cheap food. It can be frozen for a long time – still, it will be 10 times better than 'industrial' ready-made pierogi from a grocery store. It is a universal dish – you can put inside as many things as you like. And, although making a good pierogi dough is a bit tricky and requires some experience, you will become an expert faster than you think.
So, contrary to appearances, it is not difficult to learn how to make tasty Polish pierogi. The base of pierogi taste is their filling. This is quite easy and you can find many pierogi filling recipes on the Tasting Poland website. The most difficult task, however, is how to make a good pierogi dough. Here, you will need not only trusted recipes, but also some experience. The pierogi dough is often undervalued, but in fact, this is what decides whether your pierogi will be excellent or not.
What I love about this Polish food is a fact that pierogi is a dish in which you can really use your creativity. There are countless possibilities to serve it. It can be just boiled, additionally fried, or even baked. It can be served with many additions you like, including dips. The number of fillings is countless and limited by your imagination alone. You can change the taste of the pierogi dough by using some milk instead of water, or adding the yolk of an egg. You can also make a colorful pierogi dough… yellow, green, pink and orange (using natural juices). And at the end pierogi can be frozen for prolonged periods of time without losing their quality. All that combined creates a dish with a great potential – for a long, long time you won't get bored with this excellent Polish food. You can read more about these below (10 tips & tricks on making pierogi).
Collection of authentic, well-tried Polish pierogi recipes
I have made every effort to publish pierogi recipes (and all other Polish food recipes), that are detailed enough. Since often the success of the food we prepare depends on details, and since the visitors of this website are probably not Polish, such detailed recipes and accuracy are necessary. At least this is what I think :) I would also like to add that the majority of Polish food recipes on Tasting Poland are well-tried. These are my reliable recipes, and they are based on authentic Polish cookbooks and culinary traditions. I hope that you will find useful this recipe collection. Good luck!
Recipes:
Pierogi dough - authentic Polish recipe
Pierogi with meat filling recipe
Pierogi/uszka with mushroom & cabbage
Uszka for the Christmas Eve clear borscht
Pierogi with bil-, blue- or strawberries recipe
Pierogi with white mushrooms and eggs recipe
Making pierogi according to Eastern European recipes
How to make pierogi? Looking at some authentic Polish pierogi recipes we find few basic tastes and regional diversities. But what you will genuinely like in this wonderful Polish dish, is that making pierogi is an art – you can use your creativity. And here comes a picture of what is the most basic and traditional specialties are:
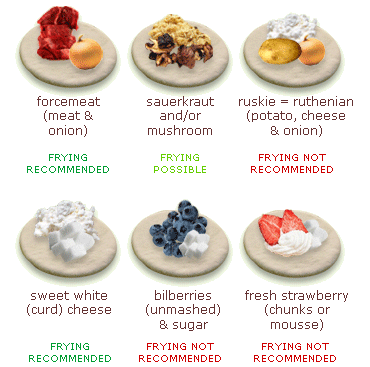
Pierogi are simply made of dough and filling. These very simple compositions are merged into pierogi in order to make you happy :) Making pierogi obviously starts with preparing the dough. A trusted, authentic pierogi dough recipe is published on Tasting Poland (pierogi dough recipe). This is based on a well-tried Polish food tradition. The pierogi dough is made from wheat flour, water, salt and a bit of oil.
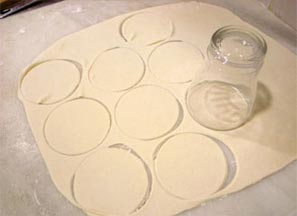
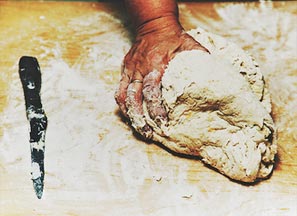
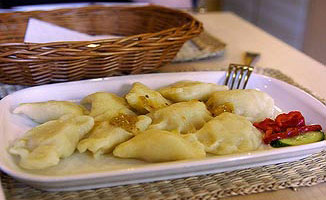
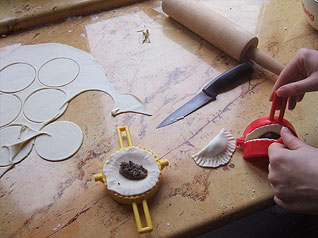
After mixing ingredients and kneading the pierogi dough is being rolled up on a table or pastry board. Circles are cut out using a drinking glass. Then, in the middle of every circle, we place a portion of the filling with a teaspoon. As I mentioned above, this could be a meat filling, small heap of sauerkraut and mushrooms, ruskie filling (aka ruthenian, potato & cheese) or sweet curd cheese. Also, it could be a few thin slices of strawberry with a bit of cream or a handful of bilberries, or blueberries. Of course, you can find traditional pierogi filling recipes on Tasting Poland, but it is always great fun to give a free rein to your creativity and invent your own pierogi fillings.
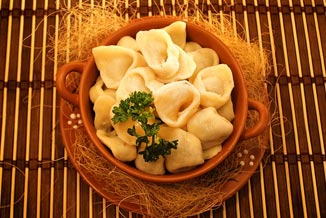
When the filling is placed on pierogi circles we fold / wrap the pierogi dough, forming a semicircle. In order to seal pierogi, their edges should be pressed with your fingers or a fork. There are also some pierogi makers available to buy. Theoretically, this stuff is meant to make folding of pierogi easier and faster. Pierogi are always semicircular in the Polish cuisine (I have read some time ago that this characteristic, traditional shape of pierogi comes from the time when it was a ritual food, used in a solar worship – this sounds interesting ;)
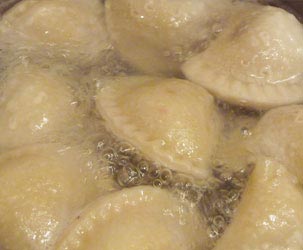
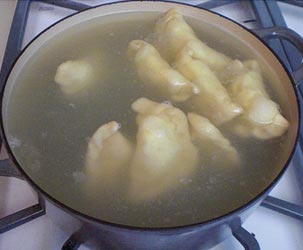
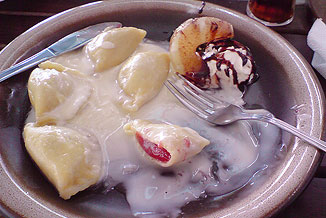
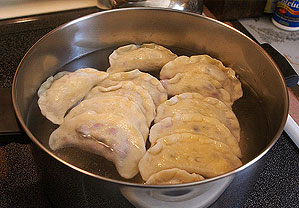
Raw pierogi are ready to be boiled. To cook pierogi, boil lightly salted water, and then throw pierogies one by one. After few minutes this Polish food will float to the surface and soon will be ready to be drained off. Well, that is nearly all and after some decoration a delicious food is ready to eat! Usually pierogi are served with some additions and, as I think, this is somehow important. Of course, the type of addition of course depends on the kind of pierogi filling. You can use pork scratching, roux, bacon or fried onion to decorate pierogi with meat, mushrooms or sauerkraut. Sweet pierogi are usually dished up with fruit sauces, sweet cream, maple syrup, yogurt etc. Just pour what you like over pierogi.
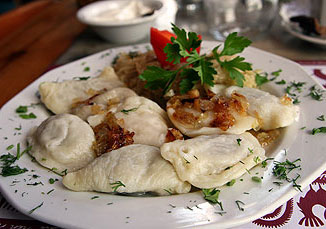
However, in Poland pierogi are most often served after additional browning on a frying pan or more rarely baking in the oven (as I have noticed butter is the best for frying pierogi, but oil will also work). Personally, I prefer to eat fried pierogi rather than the ones that have been boiled only. So I do it whenever I can. You should not fry pierogi with fruit because these are very juicy and are likely to crumble on a frying pan. What is even more important, I have noticed this many times, some frozen pierogi bought in a grocery store or Polish deli cannot be fried at all. They break down, melt and become unappealing. Oh well, ready-made foods always have some disadvantages. A stage of boiling and frying pierogi requires no special wisdom of course, neither is laborious. The whole thing about frying pierogi makes sense since boiled pierogi are great and boiled plus fried pierogi are simply delicious.
In general well-made pierogi can be characterized by tasty dough and filling, proper stir frying (if you like) and nice, appropriate appetizers. These all are obvious things. Pierogi dough deserves quite a lot of attention, since it is a bit tricky. Good pierogi dough should always have a delicate taste. It should not be too thick, so that the dough taste should not dominate the taste of the filling. And the amount of filling should be enough. If pierogi have about 6 cm of diameter, the width of sealed edge should be 1 cm or less. Also overcooking pierogi is very, very bad and must be avoided.
I hope that this article was helpful during your first steps in the culinary universe of Polish pierogi :) Please, have a look at some of Polish pierogi recipes, that TastingPoland has published while making every effort to do it precisely. I wish you good luck in learning how to make home-made pierogi… and here come some tips & tricks. Enjoy the taste! Smacznego!
How to make Polish pierogi – tips and tricks
1
It is much easier to glue pierogi before cooking, if you moisten half of the edge of a dough circle with some water. Also remember that air should squeezed out of the pierogi. Otherwise, they will tear during cooking. Keep an eye on it.
2
Some people add a yolk to the pierogi dough. This way, the pierogi dough is a little bit tough and 'cartilaginous'. Usually original Polish pierogi dough is made without eggs (I do it this way also). That makes pierogi more delicate and soft.
3
50%-75% of water we use to prepare the pierogi dough can be replaced by milk. The dough will be more delicate and its taste will be a great fit to all sweet fillings: fruit and sweet curd cheese. It is also possible to use slightly sweetened milk (about half a teaspoon of sugar per 1 glass of milk).
4
We should cook pierogi in water with some oil, so that they don't get glued together. The second very important thing is to throw pierogi onto boiling water. It means that you should not throw a sackful of pierogi (particularly frozen ones!), and let water to cool down. If you have a lot of pierogi to cook use a larger pot and a lot of water. Otherwise cook pierogi in few smaller batches.
5
The fact that pierogi are not a dish which should be prepared hastily can be a real problem for some. Admittedly, making pierogi step by step is a bit time-consuming. Personally, I usually make a lot of pierogi at once, and freeze a considerable amount for later (see tip 6). On the other hand, there are a lot of pierogi makers in stores with household appliances. This utensil is meant to speed up your pierogi sealing – quite a good idea, indeed. The quality of models varies. Those cheaper, plastic pierogi makers are particularly prone to break during operation. I think it is worthwhile buying a better, metal utensil. Their typical price is from 10 up to 20 dollars. Remember to grease the surface of the pierogi maker, so that the dough does not stick.
6
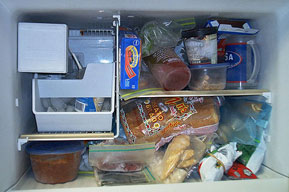
Pierogi are perfect for freezing (however, do not freeze raw pierogi dough). All you need to know is how to freeze pierogi. Since not boiled raw pierogi are likely to crack in a freezer, they should be slightly boiled first (this is the so-called blanching). Throw pierogi into a pot with boiling water + some salt + 1 spoonful of oil. Stir and wait until they sail out. Then, immediately catch pierogi and throw into the second pot with very cold (or icy!) water containing 1-2 spoonfuls of oil. It is important - please notice that we do not cook pierogi after sailing out (we do that only with pierogi that are going to be consumed). Now wait a while and arrange the cooled pierogi on a serving tray. Put the tray into the freezer. When frozen, throw pierogi into plastic bags for the sake of convenience. We heat up home-made frozen pierogi by ordinary cooking in water (heating in microwave oven is also possible, but I don't recommend it). Be careful not to cook them for too long. Frozen pierogi keep their taste, freshness and sustenance. In contrast with ready-made pierogi from a grocery store, these are suitable for additional frying.
7
Lithuanian housewives have a wonderful patent for savory pierogi dough. They use onion juice instead of water. The taste is great!
8
In Polish restaurants and pierogarnia one can come cross colorful pierogi. You too can make orange, yellow, green and pink dough at home. Piece of cake! To make yellow pierogi add some turmeric during kneading the dough. Orange, green and pink pierogi dough is made by replacing some water with a carrot, spinach or red beetroot juice respectively.
9
I love bilberry and blueberry pierogi for their juicy squirt while eating ;) But if you find it a problem, I have two tips for you. First. Add a bit of potato starch to bilberries mixed with sugar. During cooking, the potato starch will thicken the content of pierogi. Thanks to that, instead of juice we will have a dense sauce inside. Now, the second trick. Do not add sugar to blueberries. Sugar takes the juice out of fruit. When you make such not-sweetened pierogi, remember to prepare some sweet extras (e.g. cream or ice-cream).
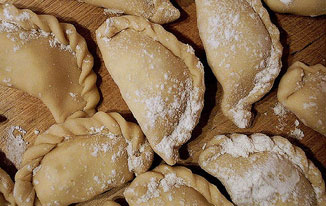
10
The peak of the culinary artistry (and dedication!) is to make pierogi with a so-called braid aka frill (see photo at right). In order to make such a beautiful pierogi first fold and seal it with your fingers as usually. Now, the first step is to raise one of two corners, bend it and stick by pressing to the pierogi edge underneath. Next, move a little further (towards the center) and once again: raise a dough (forming a frill), bend it and stick. Doing it step by step you will make a beautiful braid along the entire length of the edge. Good luck!